- SIP Server address (sometimes called SIP Proxy)
- SIP User ID (the phone number, with 1 in front of the area code)
- The password for the SIP account (a combination of letters and numbers)
To obtain these settings, you must contact Freephoneline and ask for your configuration file. There's a one time charge for this, currently $50 CAD + tax. They will send you a Word document with the settings.
Plug in the router (power, the WAN port to your modem, one of LAN ports to your computer and a phone into the phone port). Open a web browser and enter the router's IP address (usually 192.168.61.1) and login with username admin and password for the password.
Click VoIP Settings on the left menu
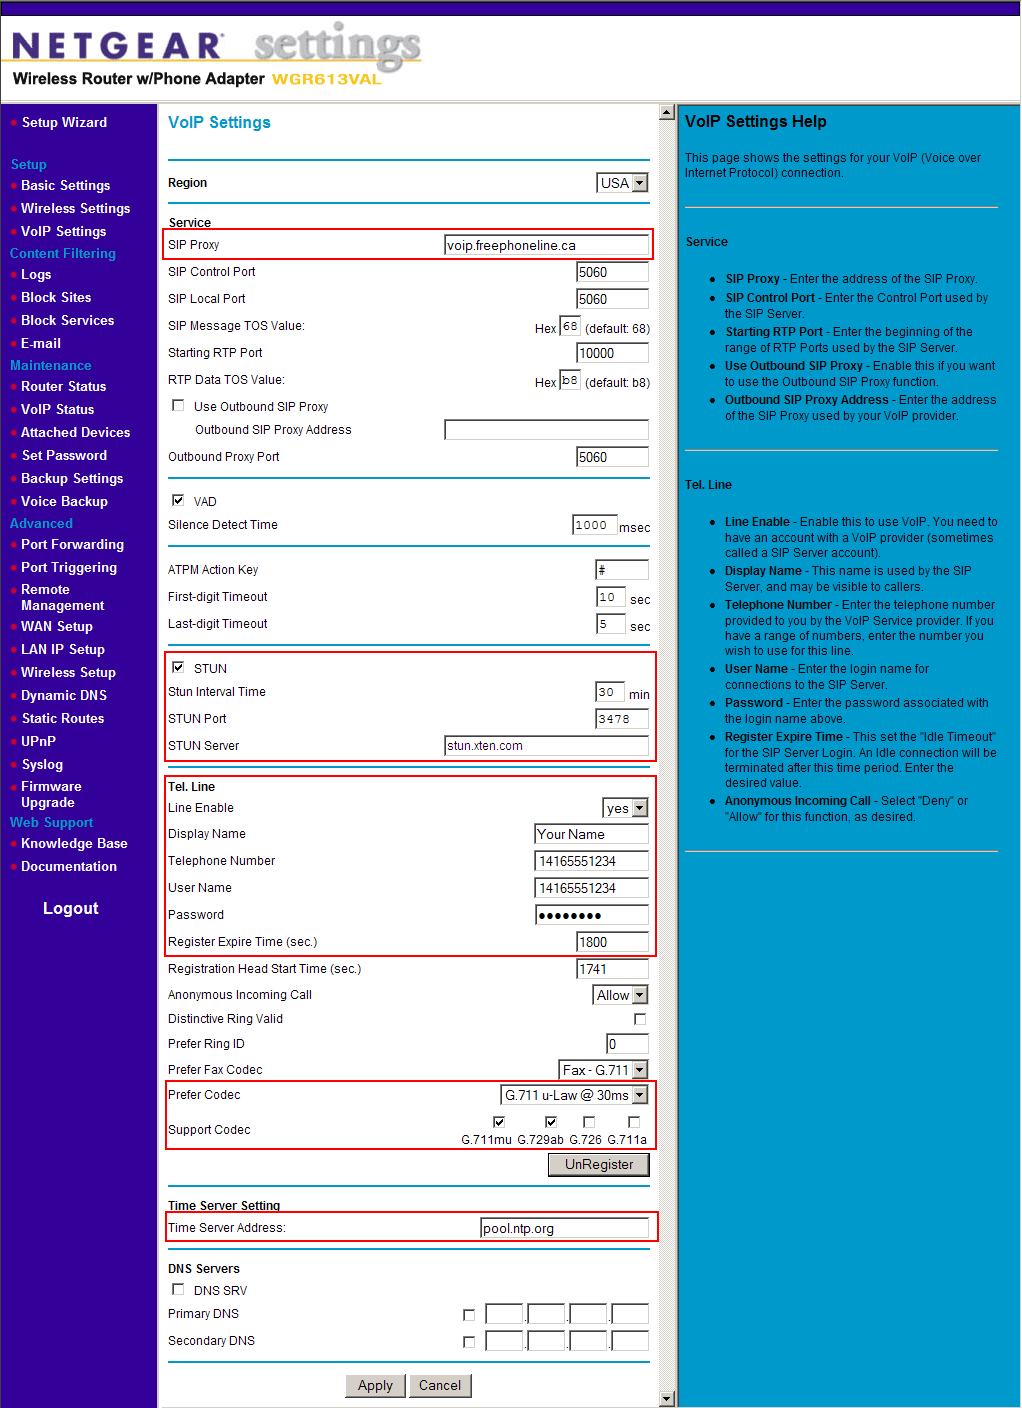
Enter the following settings:
- Sip Proxy: enter voip.freephoneline.ca (if you have one way audio issues, try also voip3.freephoneline.ca)
- STUN: enable this option
- STUN Server: any free STUN server, for example stunserver.org
- Tel Line: select yes under Line Enable
- Display Name: enter your name here
- Telephone Number: this is your Freephoneline number with 1 in front, something like 14165551234
- User Name: same as the Telephone Number
- Password: the SIP password from the Freephoneline configuration file
- Prefer codec: select the G.711 codec
- Support codec: select the G.711 and the G729a codecs
- Time Server Adress: any public time server, such as pool.ntp.org
Click Apply at the bottom, to save all the changes.