- SIP Server address (sometimes called SIP Proxy)
- SIP User ID (in most cases this is the phone number)
- The password for the SIP account
To obtain these settings, you must contact Freephoneline and ask for your configuration file. There's a one time charge for this, currently $50 CAD + tax. They will send you a Word document with the settings.
Then plug in the adapter (power, one of the Ethernet ports to your router and a phone into Line 1). Wait a few seconds, then pick up the phone and push the reset button briefly. The adapter will start playing a menu, hit 1 to listen to the IP address. Then enter that IP address in a browser.
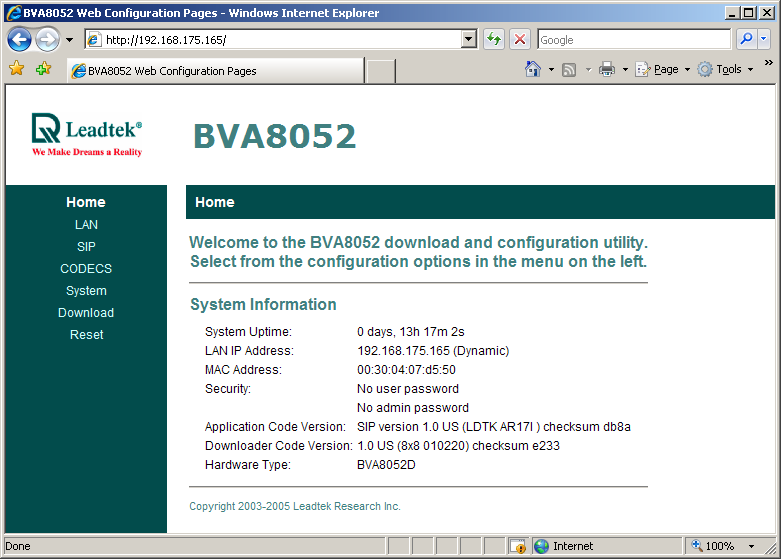
Click SIP on the left menu, then SIP Config at the top
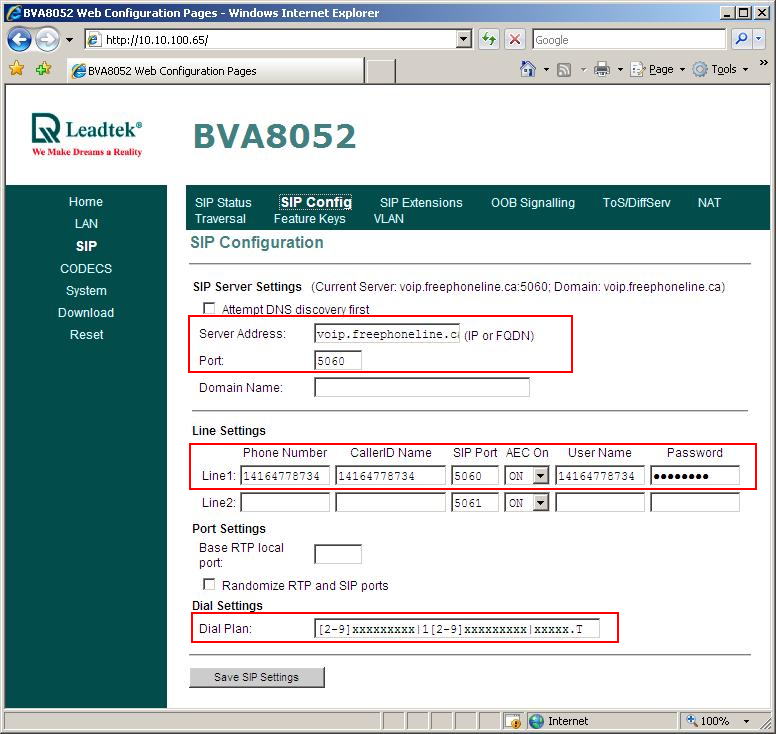
Enter the following settings:
- Server address: this the SIP server (proxy) address from the configuration file. In most cases, this should be voip.freephoneline.ca (if you have one way audio issues, try also voip3.freephoneline.ca)
- Port: 5060
Under Line1:
- Phone number: the SIP username (usually the phone number with 1 in front of the area code)
- CalledID Name: same as Phone Number
- User Name: same as Phone number
- Password: the SIP password (from the configuration file, usually 8 characters long, a combination of letters and digits)
- Dial Plan: copy/paste the following string
*123|*xx|[2-9]xxxxxxxxx|1[2-9]xxxxxxxxx|911|011xxxxx.T|00xxxxx.T
Now click Save SIP Settings at the bottom, then go to the NAT Transversal menu:
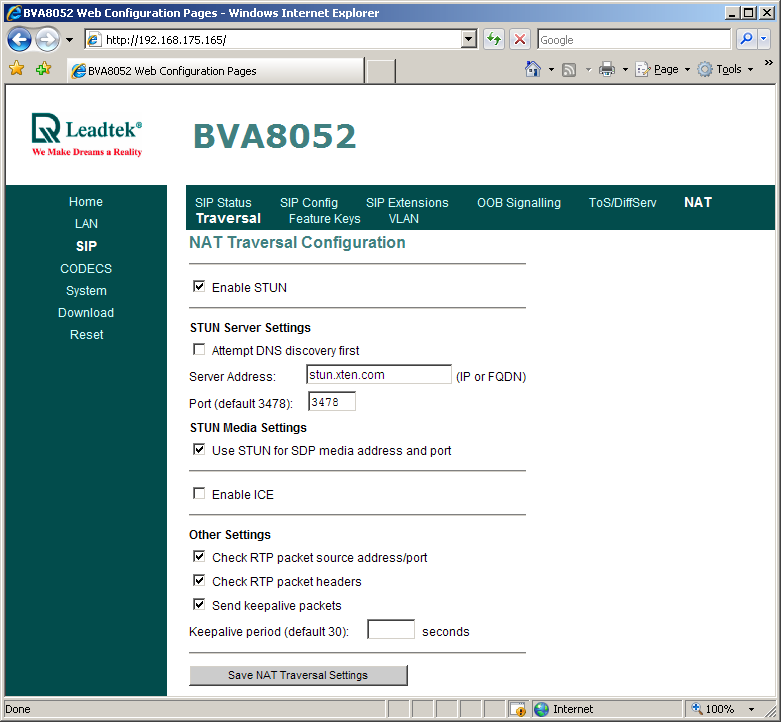
Enter stunserver.org under the Server Address and enable all the checkboxes except Attempt DNS discovery and Enable ICE like in the screenshot above, then click Save NAT Transversal Settings.
Next, click the CODECS link on the left menu.
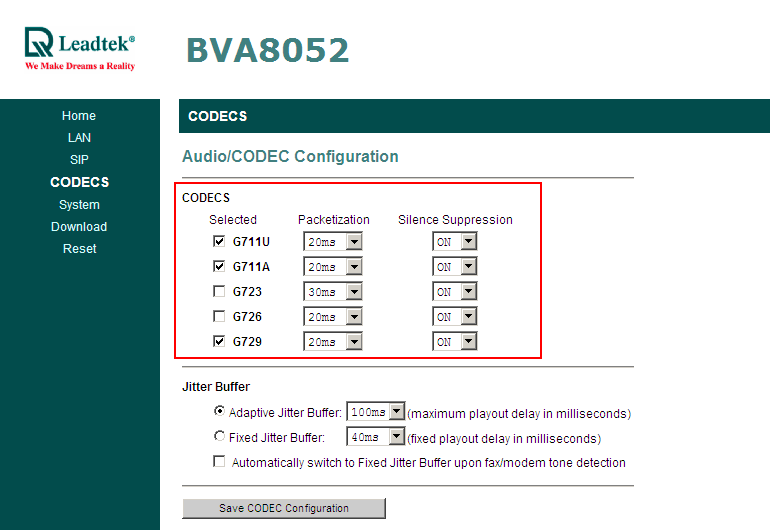
Enable the G729 codec then click Save CODEC Configuration at the bottom.
Now reboot the adapter. Wait 1-2 minutes after which you should have dial tone.
To factory reset the adapter
- unplug the power.
- connect the telephone to PHONE 1 port and lift the handset off the telephone (off-hook)
- use a pin to push the RESET button at the back of the device. Hold it while you plug the power back to the device. The Power LED should be flashing rapidly.
- continue to hold the RESET button until you see four of the six LEDs flashing in a pattern (takes about 5-6 seconds). Release the pin and wait until all LEDs stop flashing
- put the handset back on-hook
If you're having issues dialing DTMF digits (when using calling cards, dialing phone extensions, etc) go to the SIP menu then OOB Signalling tab:
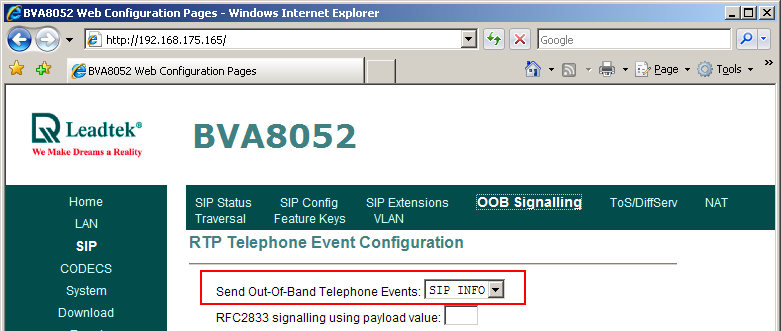
Change the Send Out-Of-Band Telephone Events to SIP INFO then click Save OOB settings at the bottom and power cycle the adapter. If that still doesn't help, try the other options for that setting.