- SIP Server address (sometimes called SIP Proxy)
- SIP User ID (the phone number, with 1 in front of the area code)
- The password for the SIP account (a combination of letters and numbers)
To obtain these settings, you must contact Freephoneline and ask for your configuration file. There's a one time charge for this, currently $50 CAD + tax. They will send you a Word document with the settings.
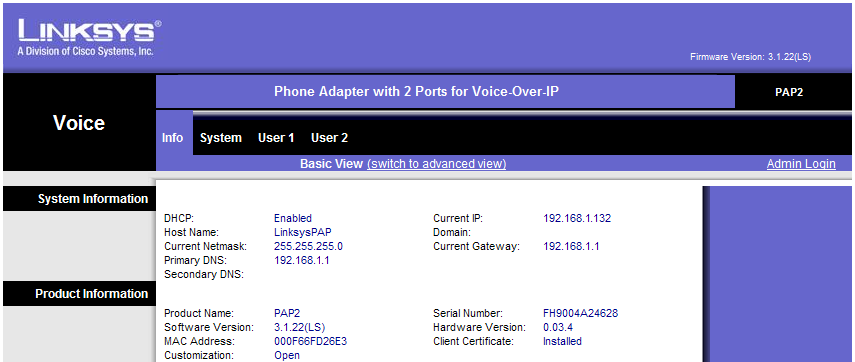
Plug in the adapter (power, an Ethernet cable to your router and a phone into Line 1). Wait about 20 seconds then pick up the phone and dial ****110#. The adapter will read back (with voice) its IP address. Open a browser and enter that IP address. The Info page of the adapter will show up.
Click Admin Login on the right , then Switch to advanced view in the middle, to get access to Advanced VoIP settings pages.

Now you're ready to configure the VoIP settings. First, we'll adjust some of the SIP parameters, so click the SIP submenu.
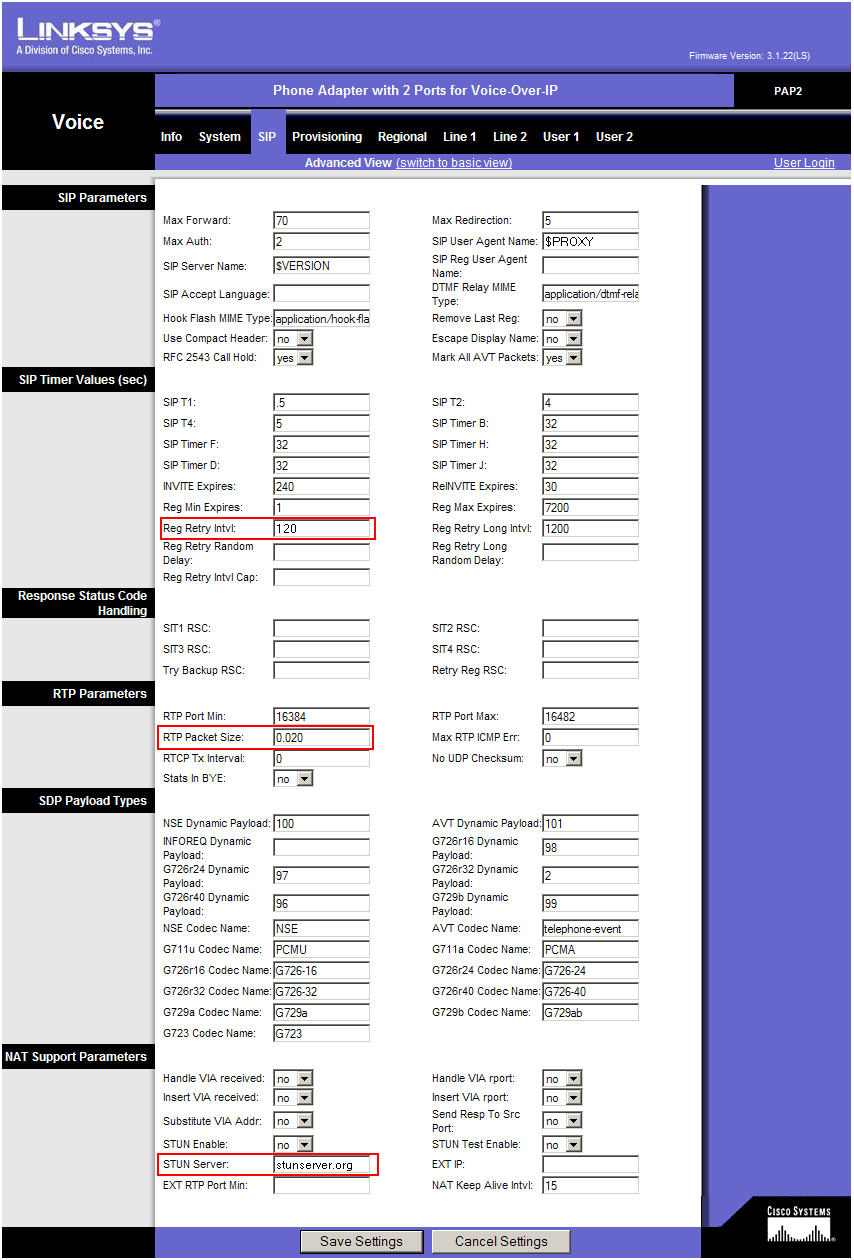
Change the following parameters:
(in the middle of the page)
- Reg Retry Intvl: 120
- RTP Packet Size: 0.020
(at the bottom of the page):
- STUN Server: stunserver.org
Now click the Line 1 submenu
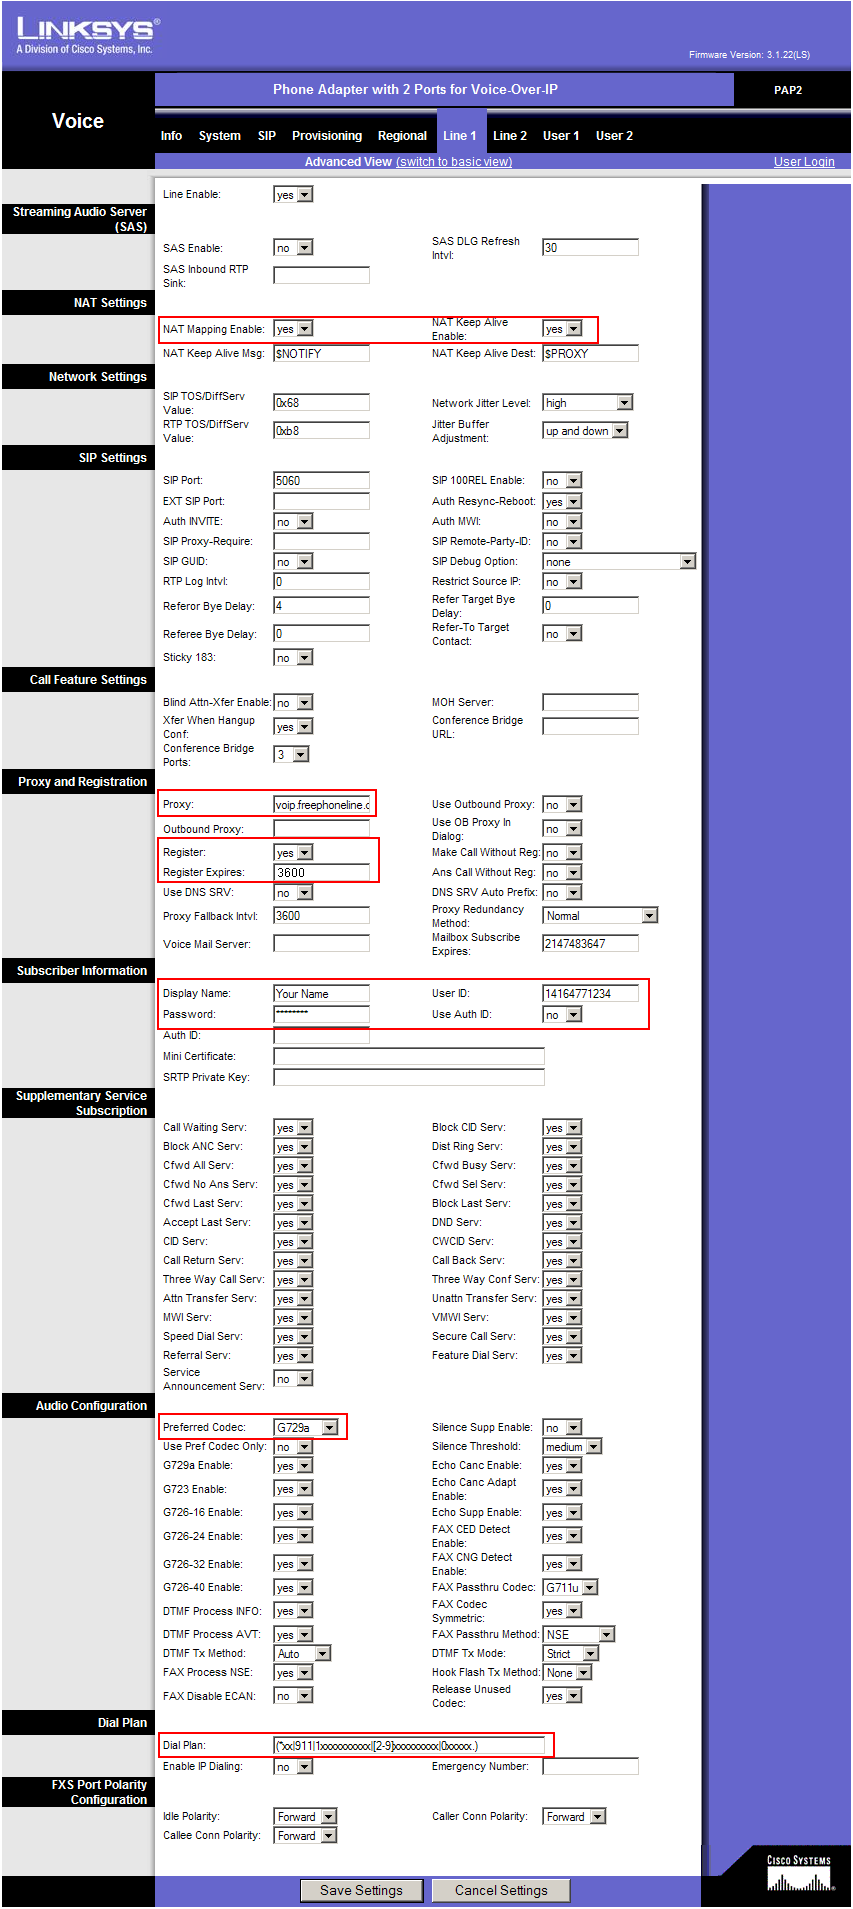
Enter the following settings:
(at the top of the page)
- NAT Mapping Enable: yes
- NAT Keep Alive Enable: yes
(about half way down on the page)
- Proxy: voip.freephoneline.ca (if you have one way audio issues, try also voip3.freephoneline.ca)
- Register: yes
- Register Expires: 3600
- Display Name: enter your name here
- User ID: your freephoneline phone number, with 1 in front
- Password: the SIP password, from the configuration file received from freephonline
- Preferred Codec: change this to G729a if you have issues with one-way audio
- Dial Plan: use the following string (including parentheses)
(*xx|911|1xxxxxxxxxx|[2-9]xxxxxxxxx|0xxxxx.)
That is all, click Save Settings at the bottom to save all the changes. The adapter will reboot and after 2-3 minutes you should get dial tone and should be able to place and receive calls.